How to Import WooCommerce Products With Images
Import WooCommerce products with images from a CSV file using the built-in importer or the WebToffee plugin, with each step from mapping to checking.
Alston Antony7 min read

Adding products to a WooCommerce store manually can be time-consuming, especially when you have hundreds of products with multiple images. Besides entering product names, prices, and descriptions, you also need to upload featured images and organize product galleries.
Fortunately, WooCommerce allows you to import products and their images in bulk using a CSV file. This makes it easier to set up a new store, migrate products from another platform, or update an existing product catalog without uploading every image individually.
In this guide, we’ll explain how to import WooCommerce products with images using the built-in CSV importer and the WebToffee Product Import Export for WooCommerce plugin.
What do you need before importing products with images?
Before starting the import, you’ll need a CSV file containing your product information and image references. Here are a few things to prepare.
1. Create a product CSV file
Your CSV file should contain essential product details, such as:
- Product name
- SKU
- Product type
- Regular price
- Description
- Product image URLs
WooCommerce uses the information in these columns to create products and assign the corresponding images. For example, a CSV file might contain the following information:
| SKU | Name | Regular price | Images |
|---|---|---|---|
| TSHIRT-001 | Cotton T-Shirt | 25 | https://yourstore.com/shirt-front.jpg |
| MUG-002 | Ceramic Mug | 15 | https://yourstore.com/mug-front.jpg |
You can also include additional columns for stock quantities, categories, attributes, and other product details.
2. Prepare your product images
Make sure the images you want to import are accessible through publicly available URLs. For example:
https://yourstore.com/wp-content/uploads/product-image.jpgIf you’re migrating from another store, you can use the image URLs from your existing website, provided they remain accessible during the import. You can also reference images already uploaded to the destination site’s WordPress Media Library using their existing filenames, where supported.
Avoid using local file paths or links that require authentication, as WooCommerce may not be able to retrieve those images.
3. Organize featured and gallery images
A product can have one featured image and multiple gallery images.
When importing several images for the same product, you must list the image URLs in the correct order. The first image is generally assigned as the featured product image, while the remaining images are added to the gallery.
The separator used between image URLs depends on the import method. WooCommerce’s native CSV importer uses commas, while the WebToffee Product Import Export plugin uses pipes (|).
Method 1: Import WooCommerce products with images using the built-in importer
WooCommerce includes a native product importer that lets you upload product data and images through a CSV file. If you’re importing a relatively simple product catalog, this method is a convenient starting point.
Step 1: Prepare the CSV file
Start by creating a CSV file containing your product data. Include a column named Images and add the image URLs corresponding to each product.
For products with multiple images, separate the URLs using commas. Since commas are also CSV delimiters, enclose the complete image field in quotation marks.
For example:
"https://yourstore.com/shirt-front.jpg, https://yourstore.com/shirt-back.jpg"In this example, the front image becomes the featured image, while the back image is added to the product gallery. Save the file in CSV format with UTF-8 encoding.
Step 2: Access the WooCommerce product importer
Log in to your WordPress dashboard.
Navigate to Products > All Products and click the Import button at the top of the page.
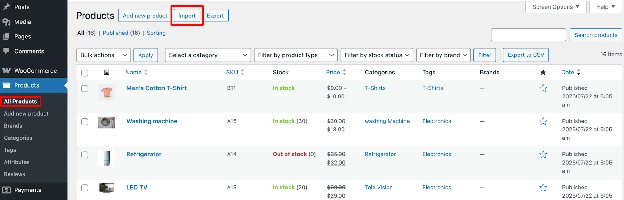
This opens WooCommerce’s built-in product import interface.
Step 3: Upload the CSV file
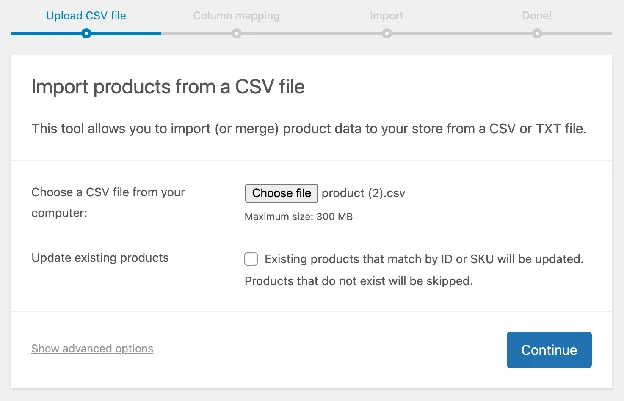
Click Choose File and select the CSV file you prepared.
If you’re adding new products, you can proceed with the default settings. If you want to modify products that already exist in your store, select the Update existing products option. WooCommerce can use product IDs or SKUs to identify matching products.
Click Continue to proceed.
Step 4: Map the product fields
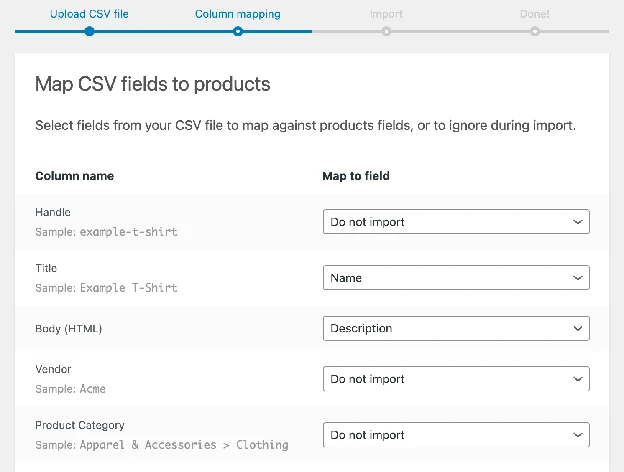
WooCommerce will display a column mapping screen where you can match the columns in your CSV file with the corresponding WooCommerce product fields.
Most standard columns, such as product names, prices, and SKUs, are automatically recognized. Find the column containing your image URLs and ensure that it is mapped to Images.
Incorrect mapping can cause WooCommerce to create products without assigning their images. Once you’ve reviewed the mappings, continue to the next step.
Step 5: Run the import
Click Run the Importer to begin importing your products.
WooCommerce processes the CSV file, creates or updates products, and attempts to download the referenced images.
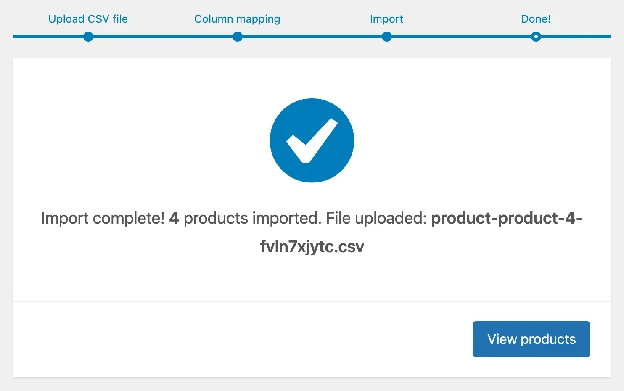
The time required depends on the number of products, the number and size of their images, and your server’s performance. When the process finishes, WooCommerce displays an import summary.
Step 6: Verify the imported images
Go to Products > All Products and check a few imported products to ensure the featured images, gallery images, and product details are correct. Also, verify that the images display properly on your storefront.
If everything looks good, your import is complete!
Method 2: Import WooCommerce products with images using a plugin
Although WooCommerce’s built-in importer works well for basic CSV imports, some stores need additional import capabilities.
For example, you might want to import product information from different file formats, customize field mappings, update large catalogs, or automate recurring imports.
In such cases, a dedicated import plugin can simplify the process. The Product Import Export Plugin for WooCommerce by WebToffee is one option. Its free version supports importing products with images through CSV files, while the premium version offers additional import sources, formats, and advanced options.
Here’s how to import products with images using the plugin.
Step 1: Install the Product Import Export plugin
From your WordPress dashboard:
- Navigate to Plugins > Add New.
- Search for Product Import Export for WooCommerce by WebToffee.
- Install and activate the plugin.
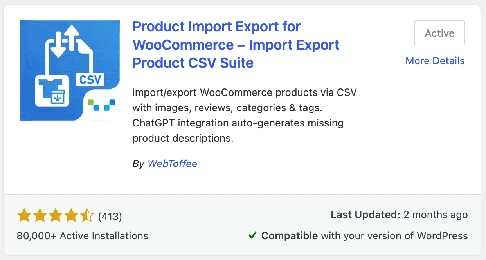
Once activated, access the plugin’s import interface from your WordPress dashboard.
Step 2: Select products for import
- Once installed, go to WebToffee Import Export (Basic) > Import from your WordPress dashboard.
- Choose Product as the post type and click Select import method.
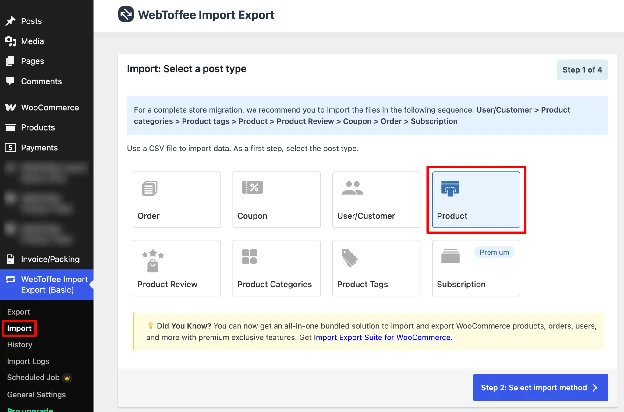
Step 3: Select your import method
Now, select the method for importing WooCommerce products and images. There are two options: Quick import and Advanced import.
Quick Import automatically imports all standard fields without requiring manual mapping, while Advanced Import lets you customize column mapping, apply filters, and select specific fields to import.
Select Advanced Import for files from suppliers, other platforms, or custom spreadsheets. Use Quick Import for files exported directly using the same plugin.
- Next, select the upload method (local file, URL, existing file, or FTP/SFTP), choose the CSV delimiter, and set the date format if applicable.
- Then, click Step 3: Map import columns to proceed to column mapping.
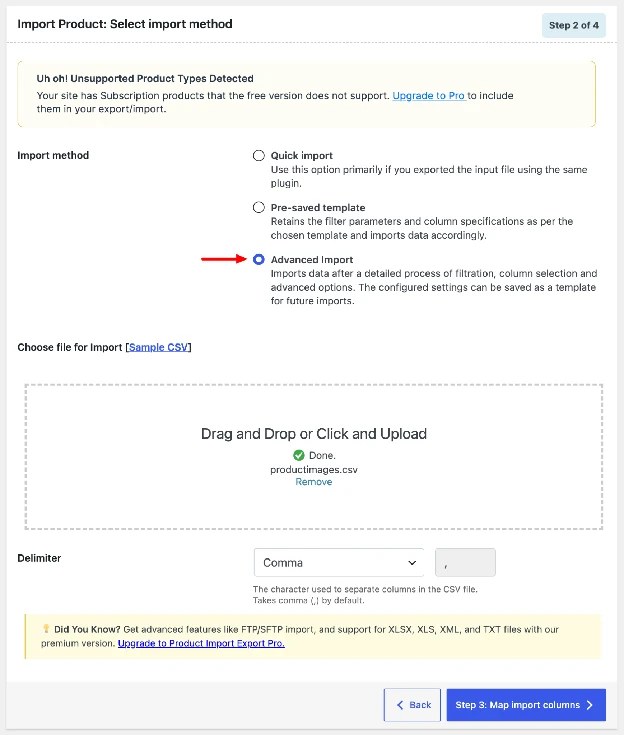
Step 4: Map product and image fields
The column mapping screen lets you match CSV columns with WooCommerce product fields. Since we’re importing all products and their images, leave the default mappings unchanged and proceed to the next step.
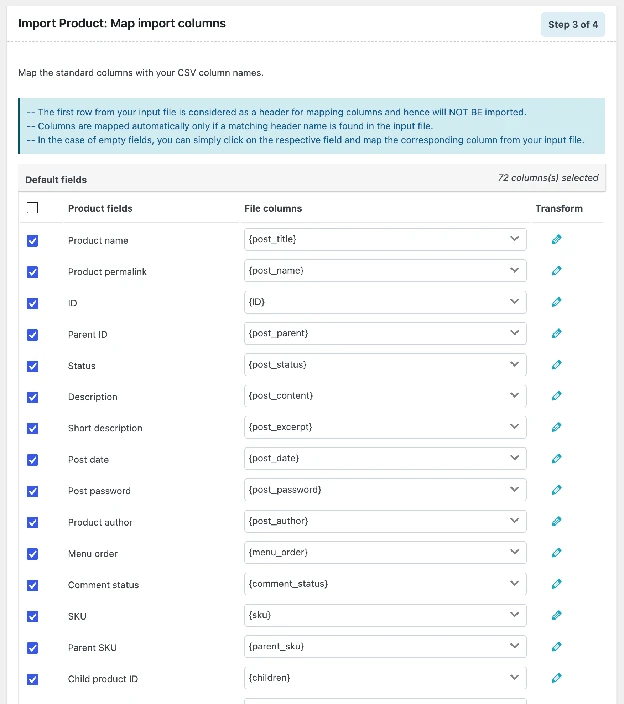
Step 5: Import only product images
If your products already exist in WooCommerce, you can add or update images without re-importing all product details.
Simply deselect all other fields and select only the Images/Gallery field. This allows you to bulk update product images while keeping the existing product information unchanged. Make sure your file includes product IDs or SKUs to match the images to the correct products.

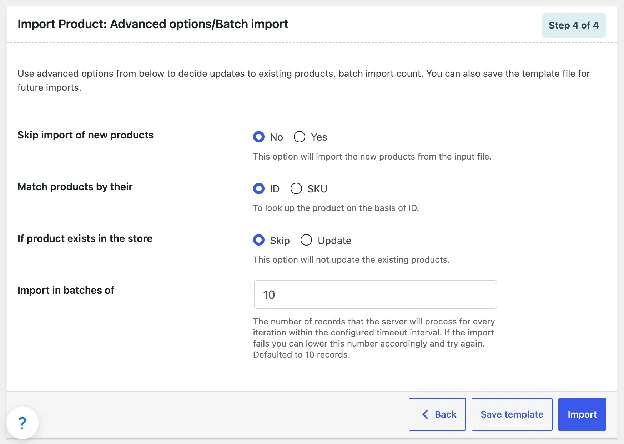
Step 6: Configure import settings
Before starting the import, configure the following settings:
- Skip import of new products: Select Yes to import images only for existing products, or No to include new products.
- Match products by: Choose ID or SKU to identify existing products.
- If product exists in the store: Select Update to update existing product images or Skip to leave them unchanged.
- Import in batches: Set the number of products processed per batch. The default is 10.
- Save template: Save your import settings as a template for future use.
Once you’ve configured the settings, click Import to start the process.
Step 7: Verify your imported products and images
Once the import is complete, the plugin displays a summary of imported, updated, and skipped products, along with any errors.
Click View Log to review the import details and identify any failed image imports. To verify that everything was imported correctly:
- Products > All Products: Check whether the imported products appear with their corresponding thumbnails.
- Individual products: Open a few products to confirm that featured and gallery images are assigned correctly.
- Storefront: Visit your product and category pages to ensure the images display properly.
That’s it! You’ve successfully imported your WooCommerce products with images.
Conclusion
Importing WooCommerce products with images is a practical way to save time when setting up a store, migrating product catalogs, or performing bulk updates.
For simple CSV imports, WooCommerce’s built-in product importer provides the essential functionality needed to import products along with their featured and gallery images.
If your store requires more advanced importing capabilities, a plugin such as WebToffee Product Import Export can provide additional flexibility for mapping product data, managing import settings, and handling recurring updates.
Regardless of the method you choose, the key to a successful import is preparing your CSV file correctly, verifying image accessibility, and testing the process before importing your entire product catalog.